Versatile and vibrant: 50 nail art ideas for kids to brighten up tiny fingertips
But the colorful world of children’s nail art is more like entering a rainbow. For children, nail art isn’t just about looking lovely; it’s a chance to be creative, to play with their favorite characters, and to let folks really see who they are.
Mother’s Day, girls’ night out, or just an ordinary weekend. When your little lady receives a mini-makeover at the hands of you or your tennis friend and there are canning supplies to be found in every pantry down the block, everyone laughs a lot and has fun together.
In this article we will introduce a variety of nail art themes that were specifically designed for children. Each section comprises a different topic and also detailed design program with steps. Campaigning for Girls, which was once about wistfulness and strawberry sherbet lipstick, has given way to a stunning array of ideas centered around “The Good Witch” in which colors are bright enough to make your eyes hurt but it’s you who can’t stand looking. The possibilities are endless- you’ll never be stuck for ideas again once you’ve read all these pages!
If you are ready to get your children started on nail art, this post is your complete guide. Turn each section into its own event, or combine all of them for a truly unique nail art experience.
No matter who you are — parent, guardian, or educator — these designs will provide you with warm memories spent together as you make them. So grab some nail polish and let’s put a smile on a tiny face.
Rainbow Delight
Rainbows are nature’s paint-box, a favorite with all ages. Follow this plan to point your nails with the colors of happiness.
Step 1: The Base
Apply a coating of white nail polish over each nail and allow it to dry totally.
Step 2: Red Royalty
Step 3: Oranges and Limes
step orange, now lime yellow on it.
Step 4: Yellows and Blues
At next follow in yellow ,light blue ,purple in the waterline order .
Step 5: Indigos and Violets
Add indigo and last, purple lacquer to finish the rainbow.
Step 6: Finishing Touch
Finally add a top coat of gloss to keep the rainbow’s vitality.
Cartoon Cuties
You will create little friends who are often seen in comics, cartoons, and TV shows, such as Mickey Mouse, Hello Kitty and minions, just for your fingertips.
Step 1: Character Selection
Decide on a character (one per nail) and which order they will follow.
Step 2: Base Coating
Use a color that complements your character as your base.
Step 3: Character Feature
The character’s famous features can be pasted on with highly detailed stickers, or painted on with the finest of brushes.
Step 4: Second Coat
Add a second finish to enhance protection capacity.
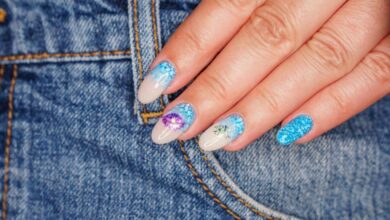
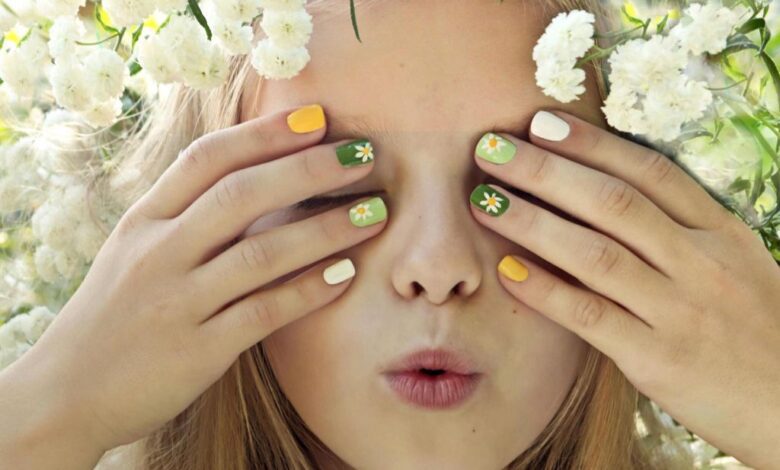
Fairy Garden
Step 1: The Underlying Pastel
begin with a light blue, yellow, or pink nail. This will help choose an easygoing color.
Step 2: Flower Power
Make a tiny flower with a triangle’s vertex inside and three sides on the outer edges to leave space for the following steps.
Step 3: Butterfly Alley
Set up the flowers with vines, and then put small butterfly wings in pastel colors beside them.
Step 4: Magic Finish
Add a sparkling top coat for the fairy dust effect.
Animal Parade
Bold, dazzling animals dance across ten tiny canvases. Ideal for the animal lover in her/him youth.
Step 1: The Rainbow Palette
On each nail, a rainbow color outlines a backdrop.
Step 2: Animal Faces
Create playful animal faces like a monkey, a kitten or a rabbit (for example). Keep it simple with just the eyes and a nose, to keep the cartoon appearance alive.
Step 3: Clean PatternsUse fine-tipped brushes to make the cleanest lines on the animals.Step 4: Prevention SealIn order to prevent the paint from flaking, seal with a top coat of glossDinosaur DashIt’s back to the age of the dinosaurs, and for kids who gaggle out good roars with their children, this design offers an earthshaking nail experience.
Step 1: Minimalist MagicBe sure to maintain balance and simplicity in the main design; only one dinosaur per nail.
Step 2: Silhouettes or FootprintsNext select between a dinosaur profile and a capsule set of footprints.
Step 3: Matt All the WayUse a matt top coat to add just a touch of rugged ancientness.Mermaid MagicIn the ocean’s depths, where the enchantment never ends, fashion a world of shimmer and glimmer set.Chapter one : Conch-er UpIt of course starts with a pink or light blue, the color of conch shells. Chapter two : The Tale of the TailDraw a flowing fish-tail on your middle fingers. Chapter three : Shell and BeachDesign colorful seashells and starfish and stuff across the other nails.
Chapter four : Top Secret008Ghost: All Topcoats use an iridescent color as a seal.Space VoyageThis is a design learned in the comfort of your own home that sends every child’s imagination whirling into orbit. Perfect for the boy (or girl) with a fascination for the cosmos.Step 1: Planet IslesJupiter and Saturn painted in their designated places, leave space for stars comets.
Step 2: Starlight and StarbrightAdd some shooting stars. Bonus points for using a glow-in-the-dark topcoat as a last touch to create the effect of night sky.Superhero SquadFest your baby on their beloved hero figures on these ten tiny fingernails. This part of the guide is about creating star-power nailart work.
Step 1: SymbolsSelect the most obvious signs identifying heroes, such as Spiderman’s web or Wonder Woman’s golden lock.Chain 2: The Pumping ArchesPut a smooth coat of liquid nails over them to add just the right amount of heroism shine.
Fruit Fiesta
Bright and new, it’s difficult to not like this sweet theme.
Step 1: Anything that Imitates Fruit
Starting with watermelon and strawberries, draw the basic shape and then color it in.
Step 2 Seed and Skin Details
Seed watermelons, strawberry pastry skins,
Step 3: Glossy Goodness Finish with top coat shine looks like fresh fruit.
Candy Land
These nail art designs satisfy sweet tooths with chocolate and sugary goodness from the candy store.
Step 1: The Confection Connection
From lollipops to gumdrops, paint your nails to look like your favorite candy.
Step 2 Add Glitter Galore
Use a top coat of glitter to imitate the sparkling sugar.
Princess Party
Elegance and a tang of aristocracy too, this section is tailor-made for every little royal.
Step 1: Regal Foundation
For an elegant base, try a light pink or lavender.
Step 2: Crown and Castle
On some nails only tiny crowns and castles shimmer with gemstones.
Step 3: Royal Seal Lay down a top coat for a perfect pearl finish.Odyssey Outer Space
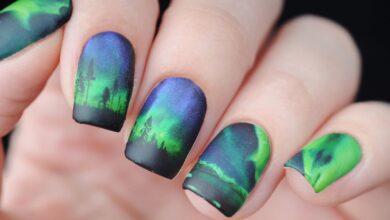
Voyage into a mystical world where creatures and adventures await far beyond the earth’s atmosphere.
Step 1: Cosmic Canvas
Start off with Navy Blue or some other very dark, almost cosmic color.
Step 2 Celestial Bodies
Use white nail polish or a nail art pen with fine tip to draw stars and planets.
Sports Spectacular
For the young sports fan, this professional sports nail art set turns your nails into a tribute to games and pastimes you love.
Step 1: Athlete’s Palette
Stating with the colors they like for their favorite teams or sporting gear.
Step 2 Sporting Details Add soccer balls and baseball diamonds plus whatever the paraphernalia for the particular sport may be
Fashion Frenzy
Fashion fads are catered for in this category, which should reflect all the things a fashionista adores most–anything elegant or chic.
Step 1: Elegant Shades
A base color that is elegant and chic (think a pastel or vivid neon).
Step 2: Accesories
Add on each finger small designs of sunglasses or handbags and even just lipstick miniatures.
WINTER WONDERLAND
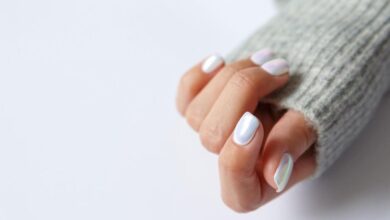
For the child who loves a beautiful white world this design captures some of the tranquility in frost.
Step 1: Frosted Fields
Use a soft white or light blue for your base if you like the wintry look.
Step 2: Winter Icons
Snowflakes, penguins, snowmen,snow in a different color.
Step 3: Snow-Capped Mountains
Lastly apply a little of the sparse glitter topcoat which actually represents winter out of doors.
DINO DIG
Prepare to uncover the past with these dinosaur-inspired nails.
Step 1: Ancient Canvas
Start with a base layer of brown or gray as a way of suggesting the earth’s soil and stones.
Step 2: Take It Slow
Fine brush, paint fossils or even egg designs in delicate detail.
Step 3: A Work of Matting
Matte top coat is just the thing to add that touch of history.
ROBOT RIOT
A special edge for the high-tech kids out there with this robotic. Funny and futuristic.
Step 1: Mixed Metal
Choose metal-like colors as a base, such as silver or pale gold to represent the robot’s sheen.
Step 2: Get Moving
On each nail, use small circles and straight lines to resemble the gear patterns and circuits.
Step 3: Shiny and New!
To keep the robot’s shiny parts sparkling, apply a shiny top coat.
EMOJI EXTRAVAGANZA
For a little digital fun, try expressing all sorts of feelings with emojis.
Step 1: One Tone
Start with a yellow base, which is the main feature of any face emoji.
Step 2: Facial Language
Use a fine-tipped brush to depict each expression–one per nail.
Step 3: Glossy SunshineFinish with a glossy topcoat for a luminous, visual-impact look.That’s a way for your children to shine.Designing nails with kids can be a joyous occasion. It’s a time to talk and create, a chance to let them use their imagination and include an own-to make statements With these 50 ideas, you will be helping them grow artistically while creating many happy memories that belong at home!Safety and fun go hand-in-hand.
Always use child-safe products and supervise during application. The goal isn’t perfection; it’s how you feel about the whole process and then enjoying results of whatever outcome!Adventure of one or many. A group art project for kids’ nails is a fulfilling way to spend parent-child time together.